Single sign on to Neptune by integrating Azure AD setup in SAP
Overview
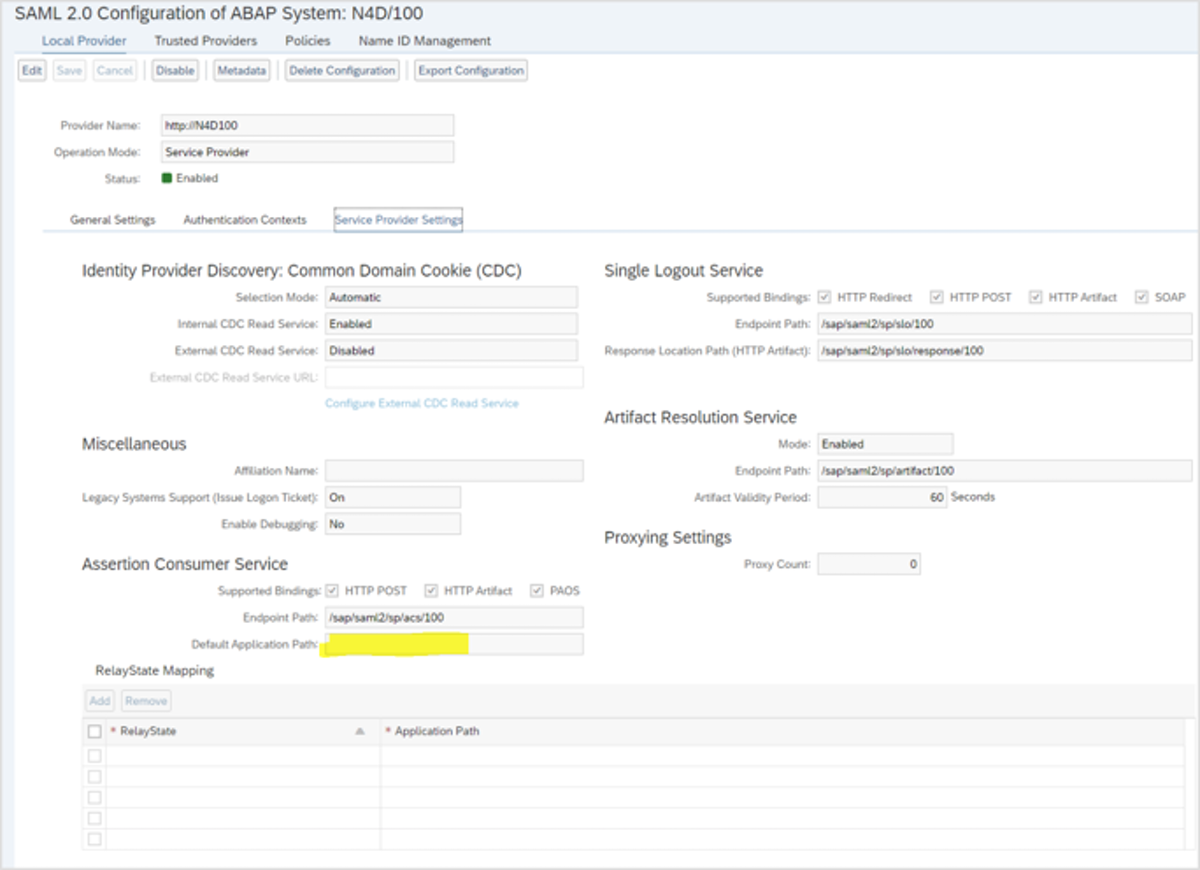
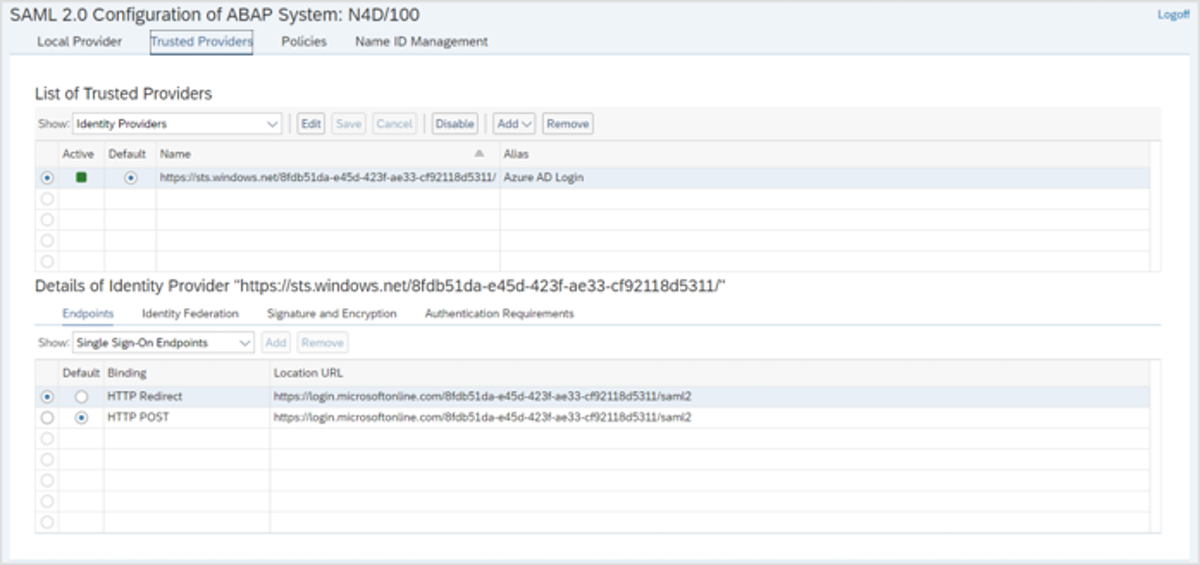
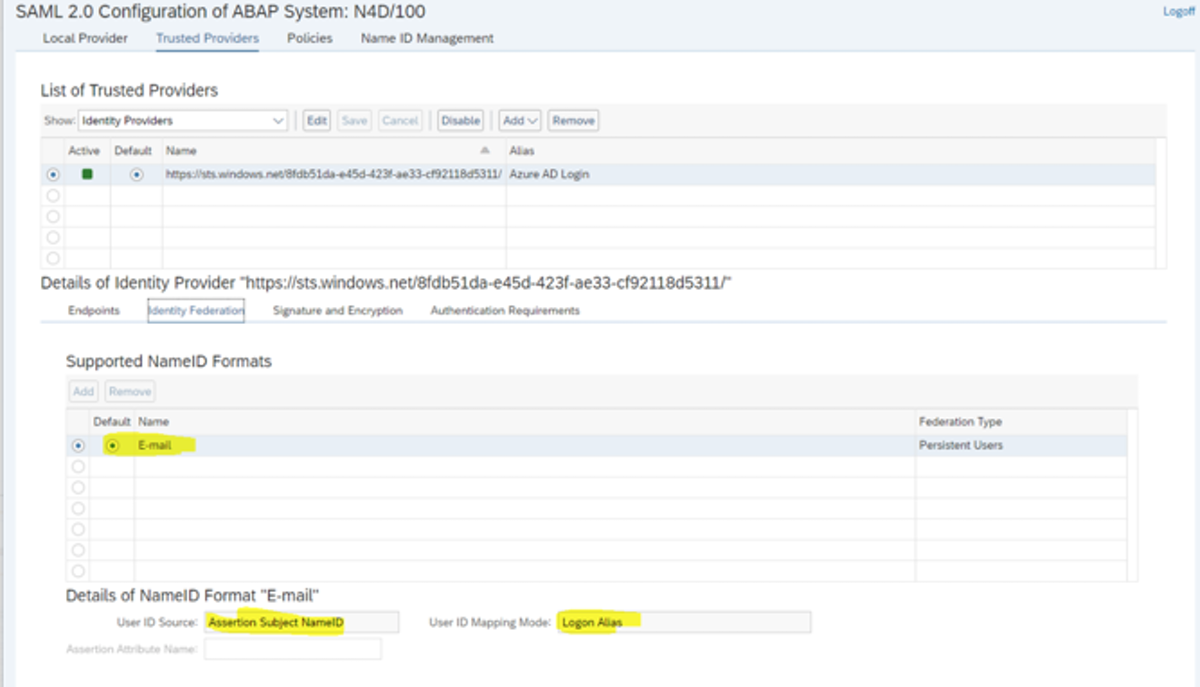
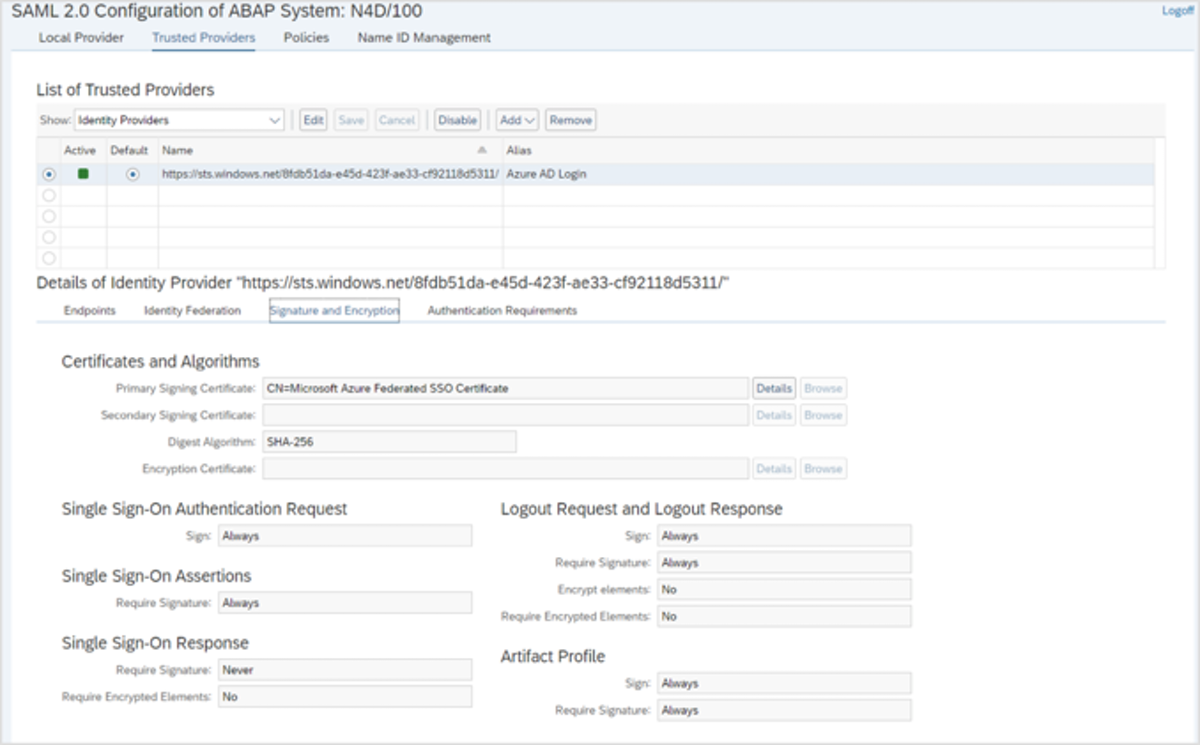
Integrate SAP NetWeaver with Azure Active Directory (Azure AD) to achieve Single sign-on for Neptune Applications.
Requirements
-
An Azure AD subscription.
-
SAP NetWeaver 7.20 and above with single sign-on (SSO) enabled.
-
Neptune DXP for SAP Neptune DXP - SAP Edition v.6.0.0 and above.
Note: Before starting to setup in Neptune DXP, please make sure Azure AD SSO is working with your SAP system. If you can log in to Neptune cockpit using your Azure AD user, you are ready to proceed.
Microsoft Azure - Enterprise App
To enable Azure AD with SAP, you need to define an Enterprise App in Microsoft Azure.
1. Navigate to Azure Portal and select the Azure Active Directory service.
2. Select the Enterprise Applications and then All Applications.
3. Create a new app and wait until it will added to your tenant.
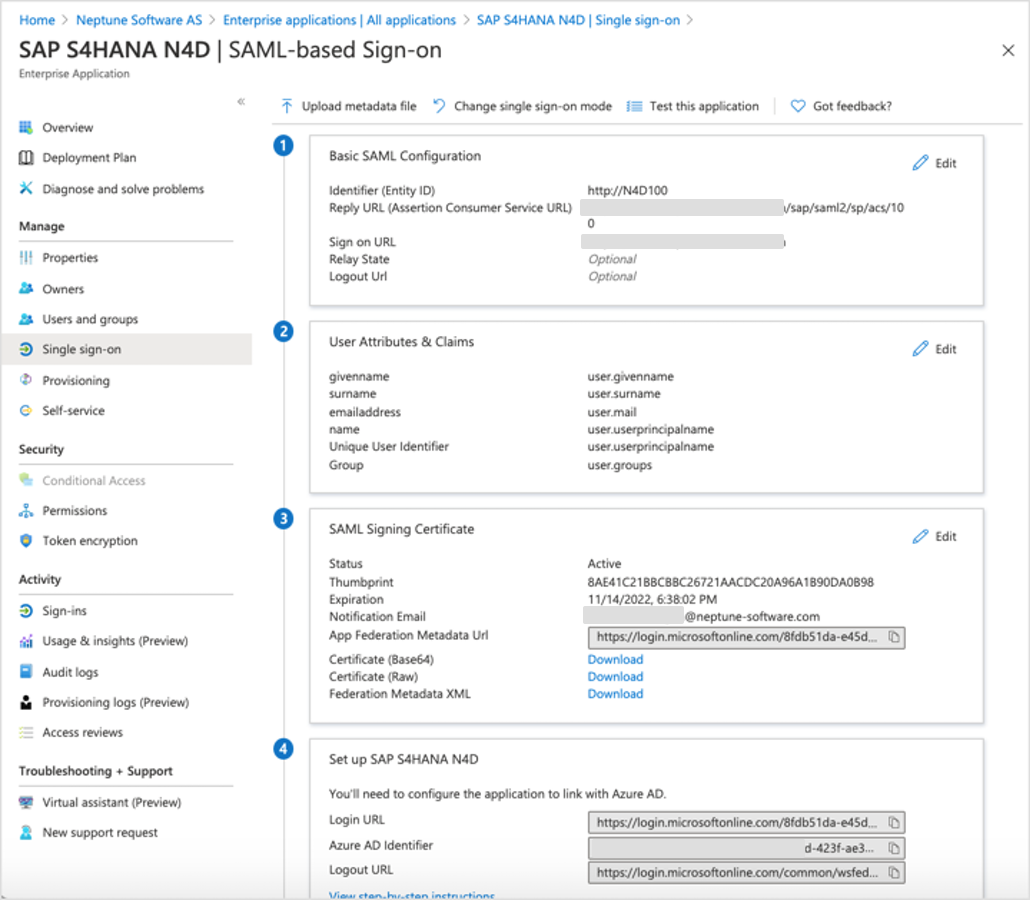
4. Go to the Single Sign-On menu item into the Enterprise App
5. Select SAML and edit the settings of the Basic SAML configs.
6. Upload the metadata file from SAP.
Your SAML setup should look as shown in the image.
Microsoft Azure – App Registration
1. Navigate to the App Registrations in Microsoft Azure and set up the App Registration blade/pane for your Enterprise App.
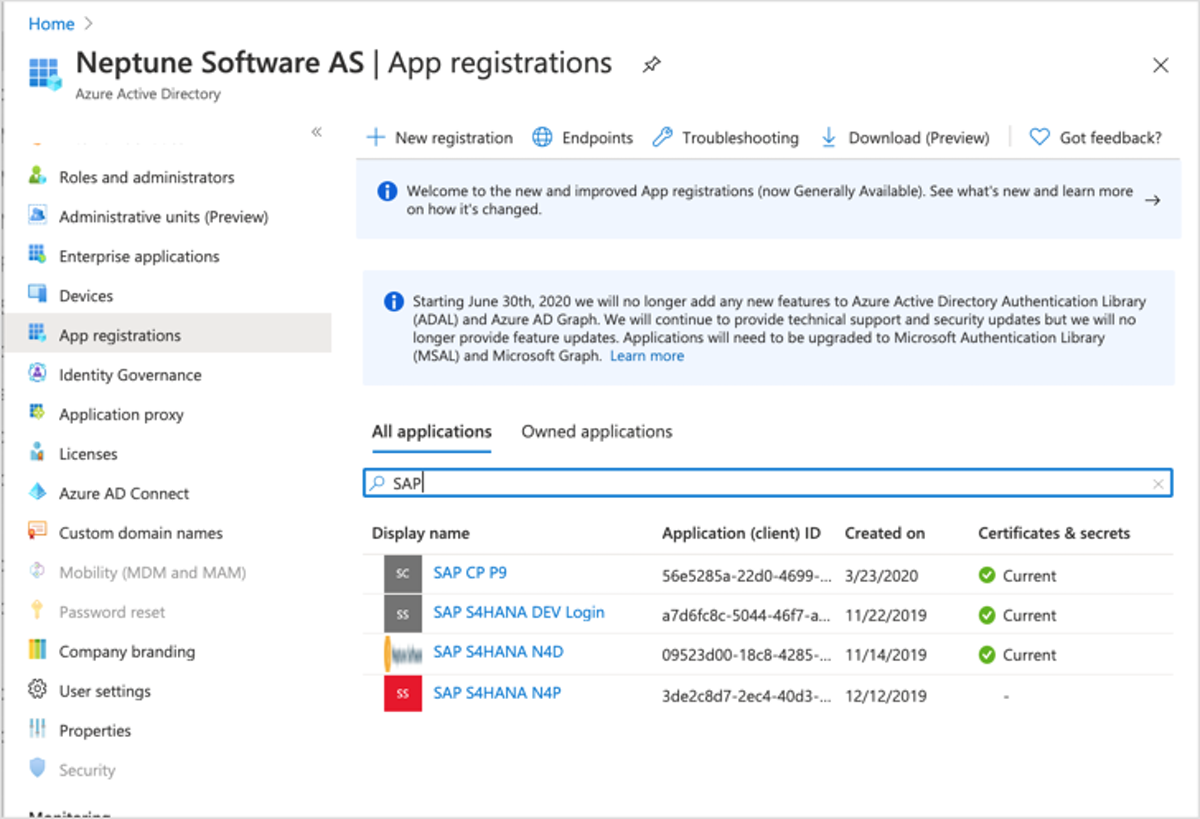
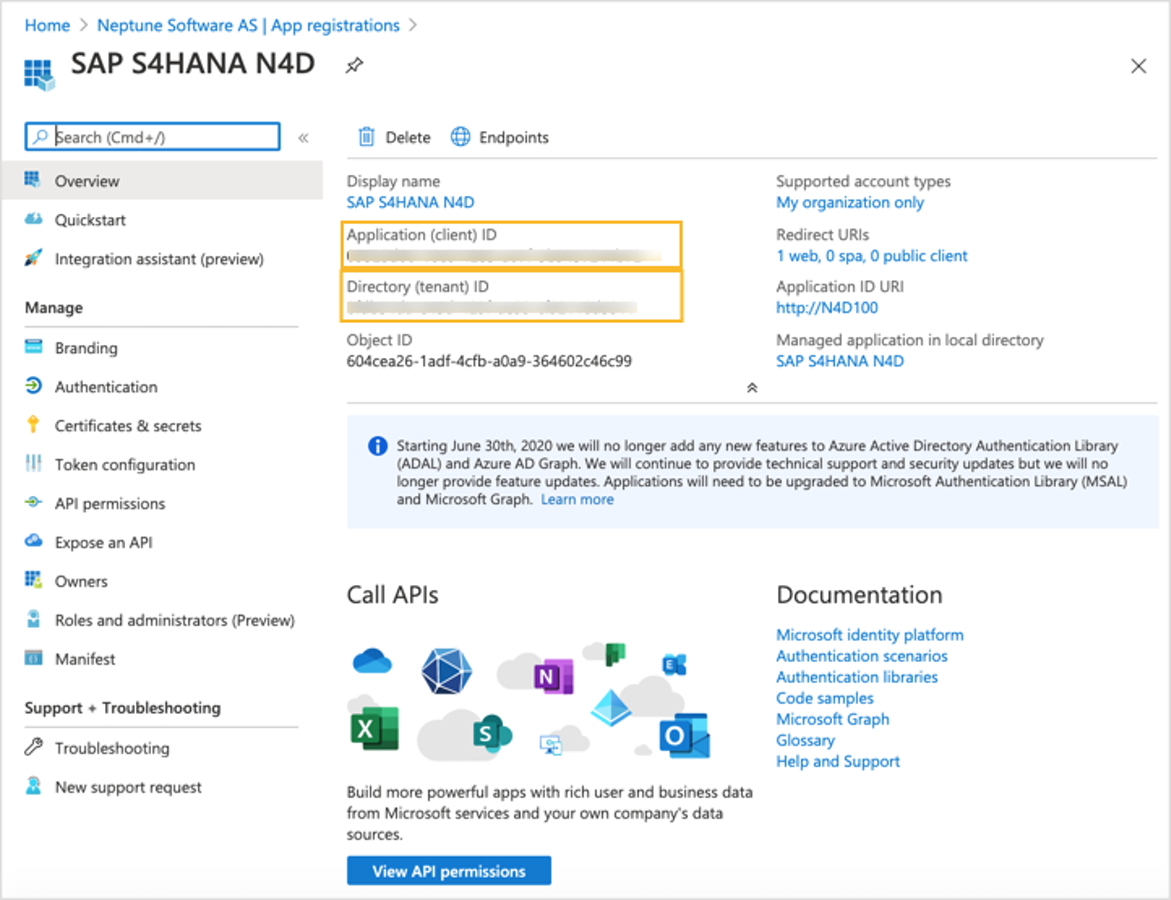
App registration * Application (client) Id* & the Directory (tenant) ID will be used later in our configuration.
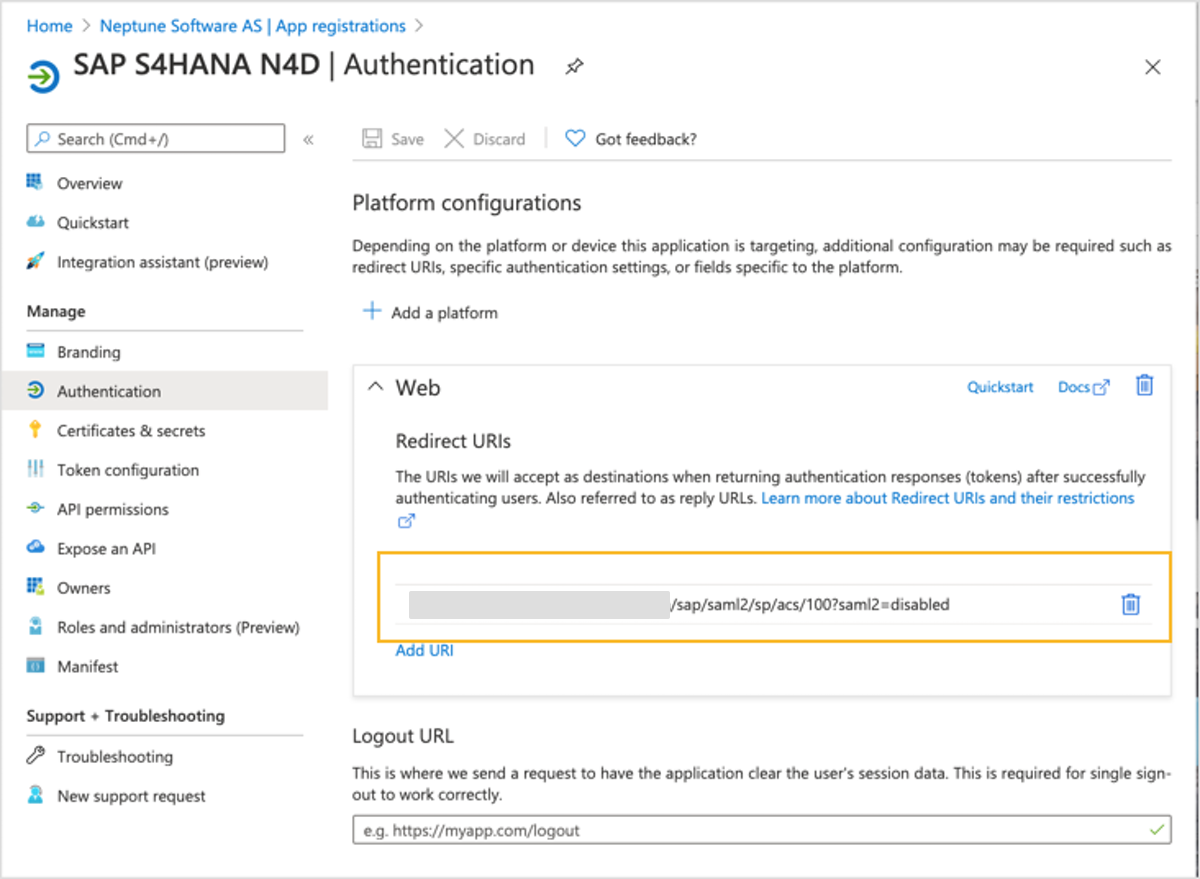
2. Now select the Authentication from the main menu and add the Web Redirect URI.
Make sure the redirect URL should be in this format:
https://yourServerURL/sap/saml2/sp/acs/sapclientNumber?saml2=disabled
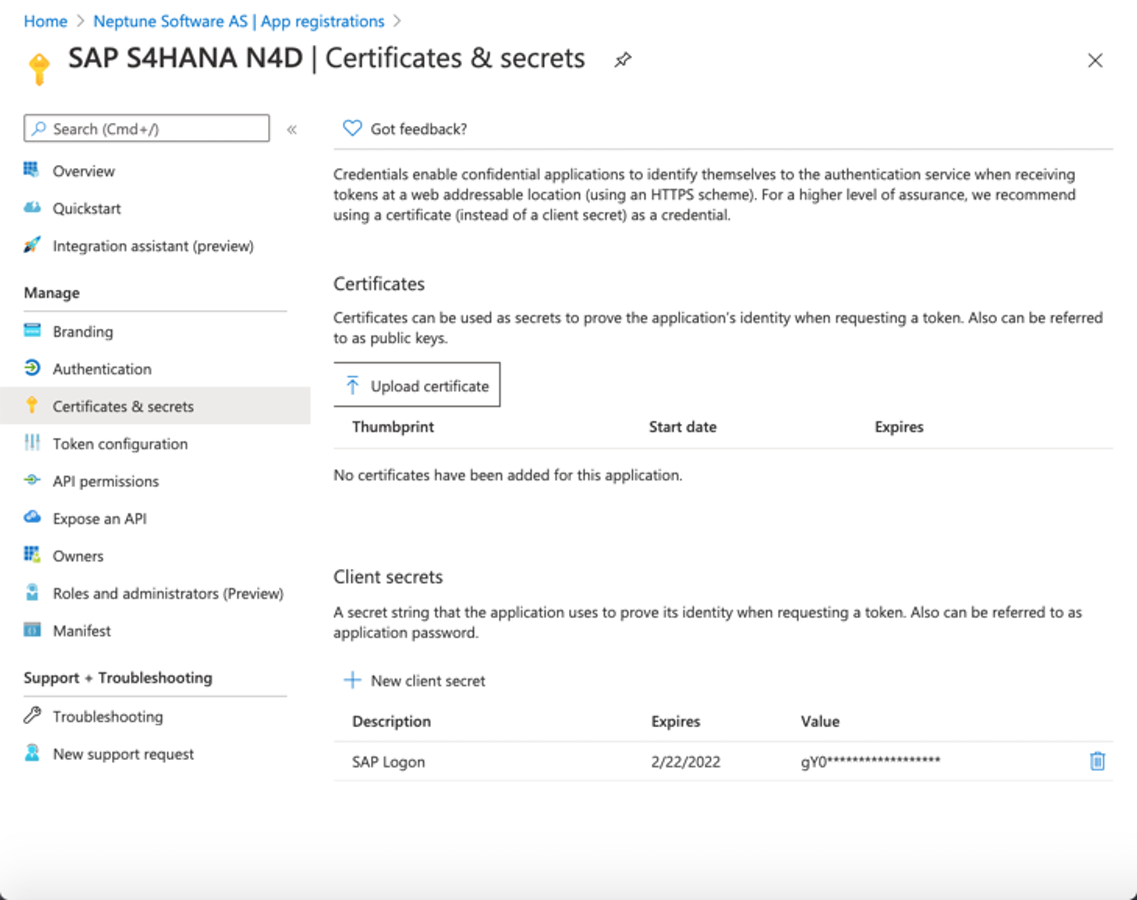
3. Create a new client secret, and remember to save this secret for later configuration.
Neptune DXP Setup
Open the Neptune DXP Cockpit . Navigate to Run → Mobile client →Authentication.
1. Add server Url and Client.
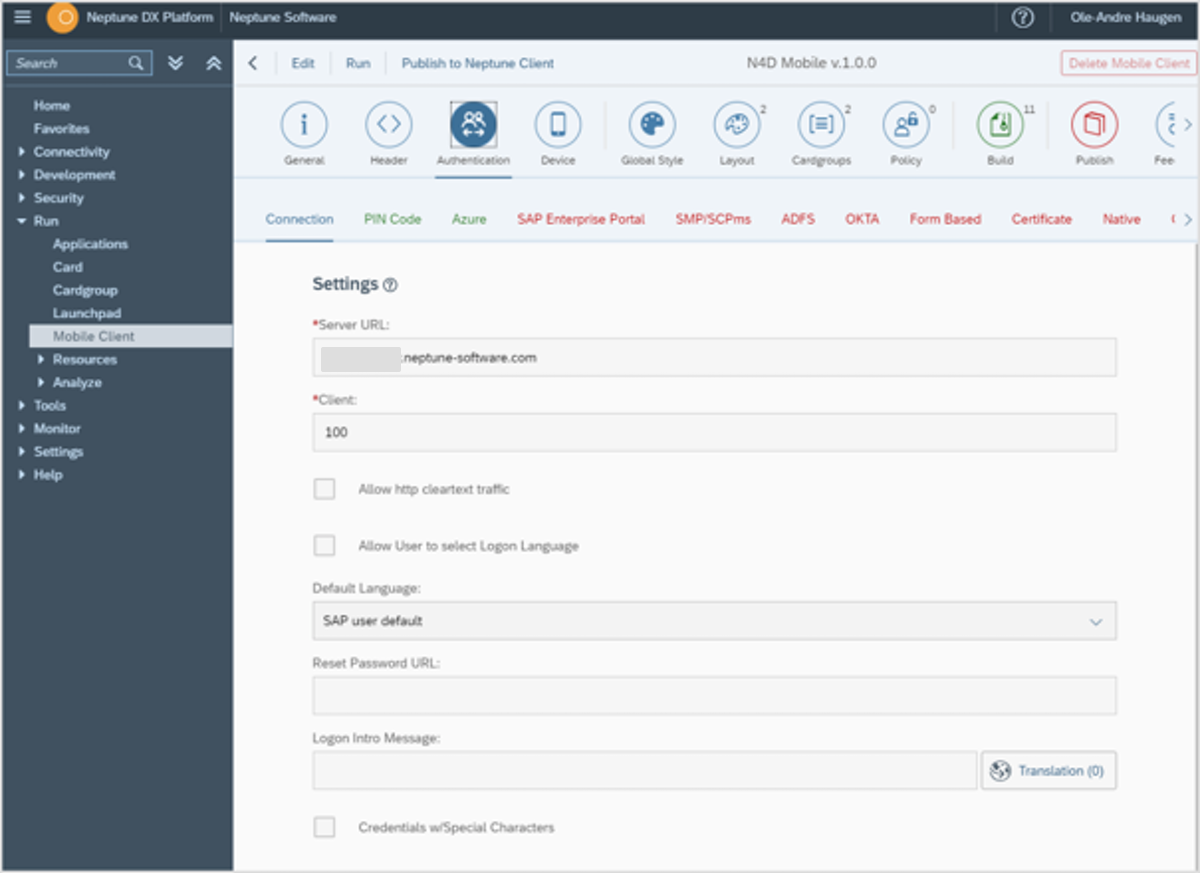
The server URL is used to your redirect URL, if not specifically set.
Go to the Microsoft Azure tab option and add Enable the Microsoft Azure settings.
Add Tenant Id ( copy from Microsoft Azure Portal → App registrations → tenant Id), Client Id (copy from Microsoft Azure Portal → App registrations → client Id) and Client Secret saved above.
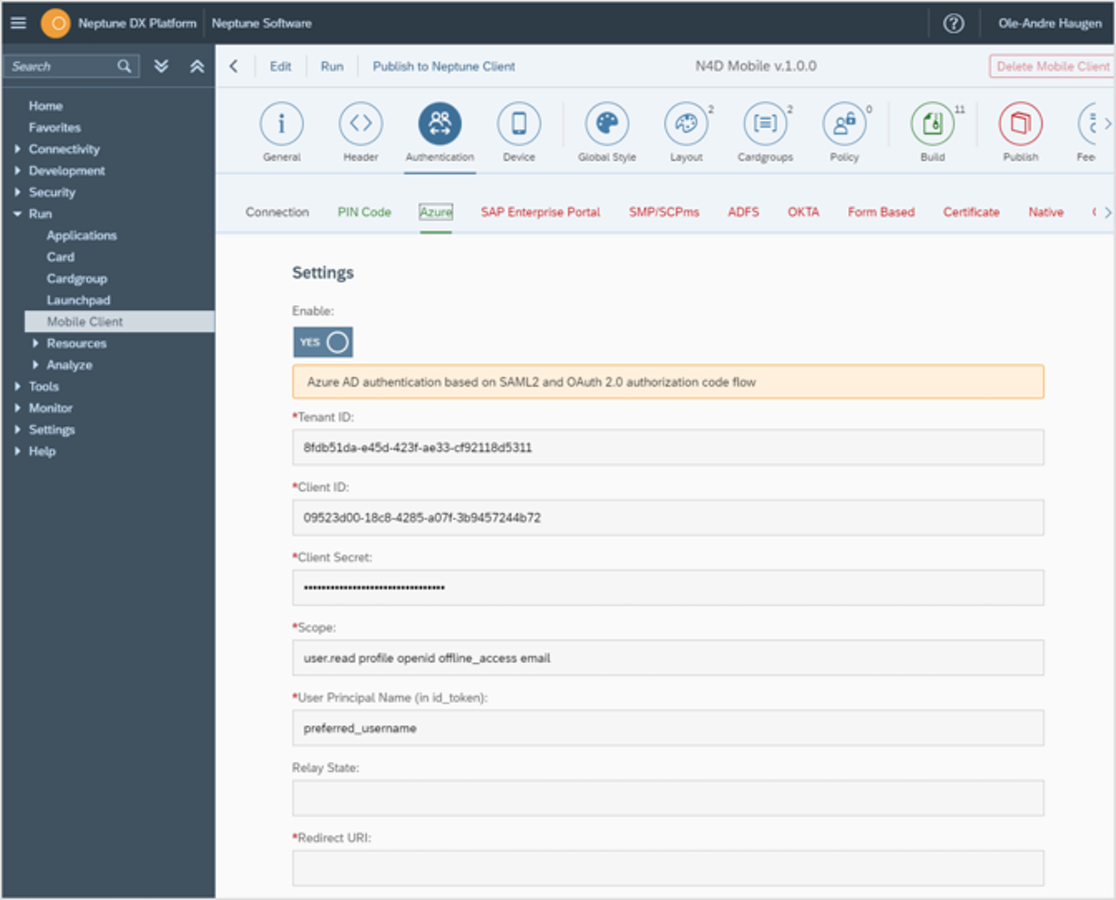
Set scope and principal name, as shown in the screenshot.
Note: Principal Name can be different in your Microsoft Azure set up.
You can test the set up in two different ways -
-
With the browser in –disabled-web security mode running the live URL
-
On the mobile client
Note: There is no other option for debugging/testing it.
