Use connectors in the App Designer
In this topic, you learn how to use a connector in the App Designer.
Using the Connectors in the App Designer, offers users a range of choices for seamlessly integrating data sources into their applications.
Prerequisites
-
You have created a connector.
Procedure
-
In the App Designer, create a new application using the Full Screen Template.
Result: You have created an application.
-
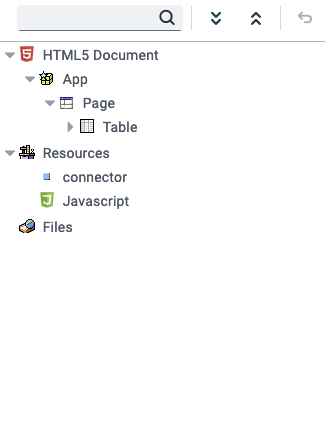
Drag a Table component in the Page of the application.
-
Drag the connector component and a JavaScript file in the application’s Resources.
-
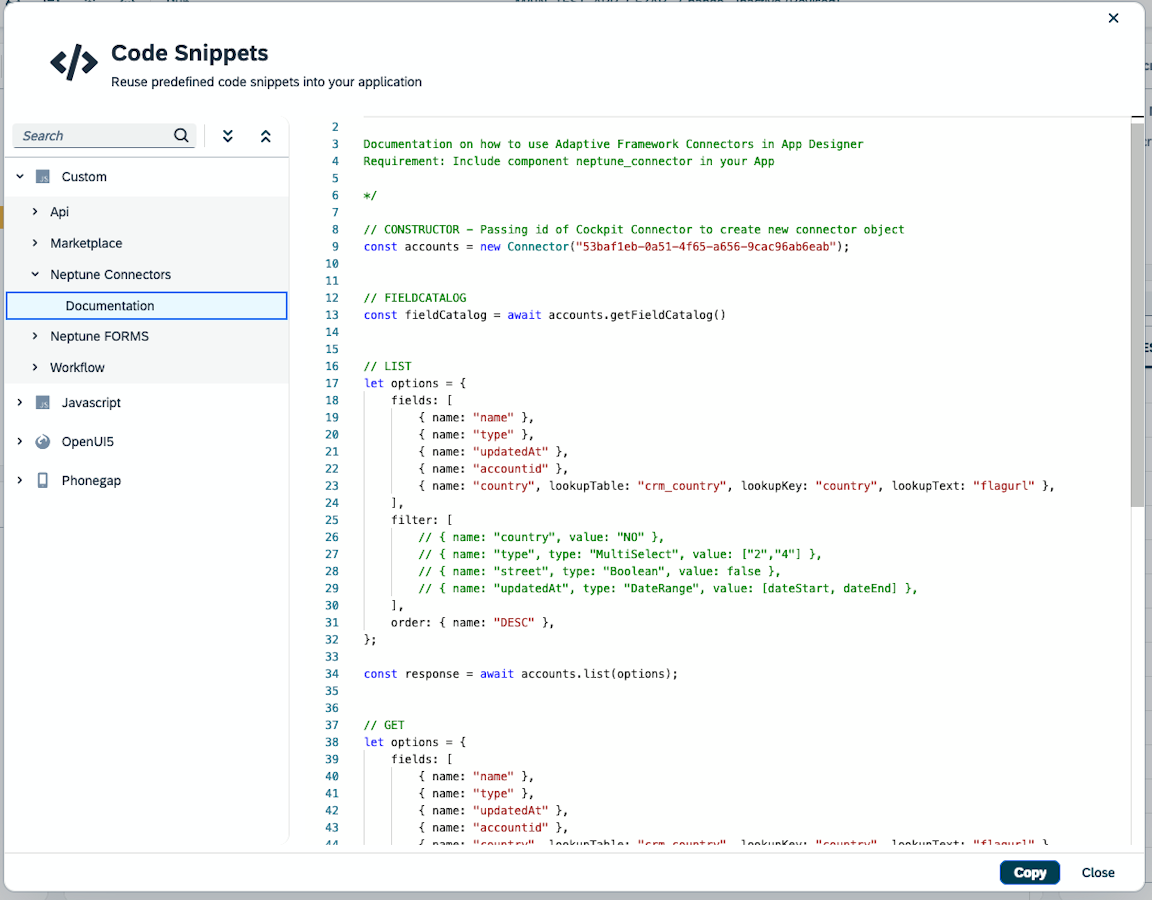
In your Javascript file, right-click, open the Code Snippets, and under Custom, you will find the Neptune Connectors code snippets.
-
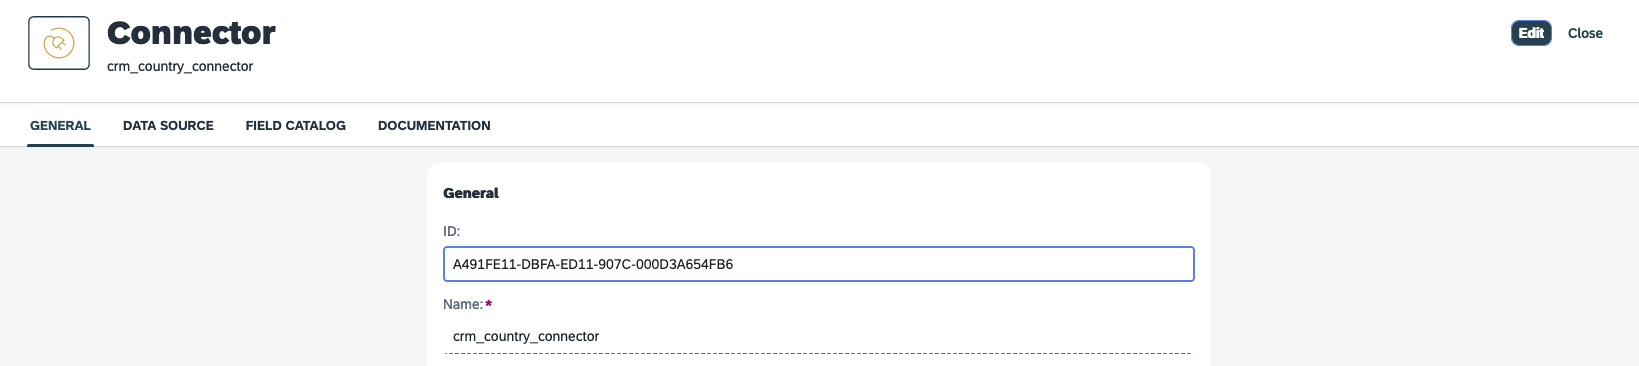
Copy your Connector’s ID from the Connector tool.
-
Copy and paste the Constructor code snippet and replace the connector’s ID with your connector ID, for example:
// CONSTRUCTOR - Passing id of Cockpit Connector to create new connector object const accounts = new Connector("A491FE11-DBFA-ED11-907C-000D3A654FB6"); -
Create an async function, paste the LIST code snippet, and set the data to your table (set the table’s Model Source to Generic Array), for example:
// LIST async function listAccounts() { let options = fields: [ { name: "flagurl" }, { name: "accountNo" }, { name: "countryCode" }, { name: "country" }, { name: "updatedAt" }, { name: "updatedBy" }, ] }; const response = await accounts.list(options); console.log(response.result); modelTable.setData(response.result); } -
Paste the Pagination and Auto Column Sorting code snippet, and call the function, for example:
// PAGINATION - Enable accounts.enablePagination({ table: Table, take: 5 }); // PAGINATION - Auto Column Sorting accounts.enableColumnSorting({ column: colTablecountry, field: "country" }); accounts.enableColumnSorting({ column: colTableaccountNo, field: "accountNo" }); listAccounts(); -
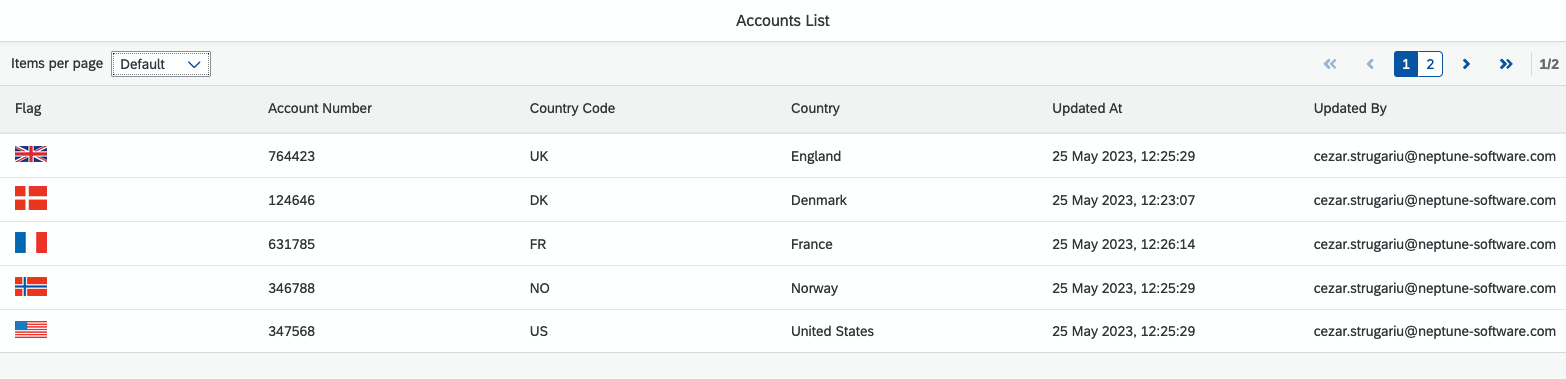
Right-click on your table, open the Wizard and define your fields, for example:
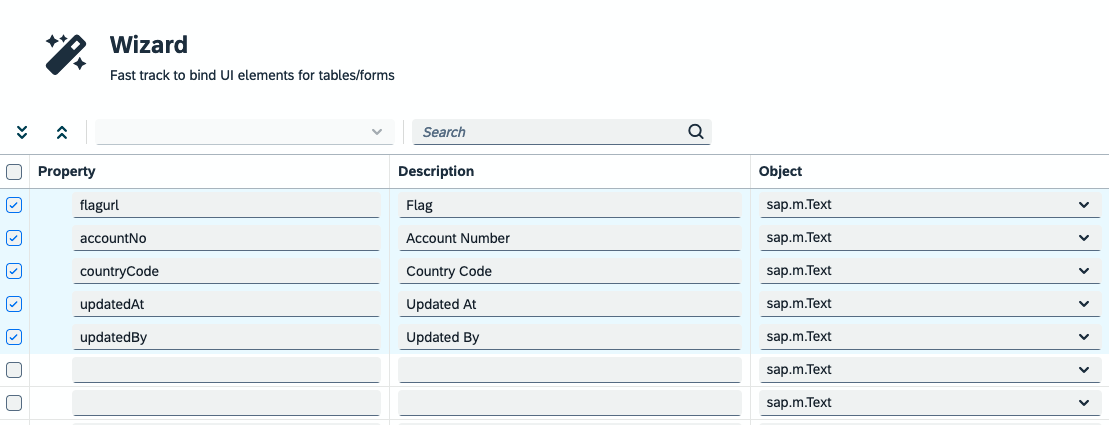
-
Save, activate and run the application: